Installing Joomla is quite a simple process and we’ll show you step-by-step how to successfully install Joomla 3.2! As you know, Joomla 3.2 was recently released so we’re excited to get started with it and begin using it ourselves!
- PHP 5.3.1
- PHP’s magic_quotes_gpc should be disabled
- PHP’s register_globals should be turned off
Installation procedure
Step 1: Download Joomla 3 Installation Package
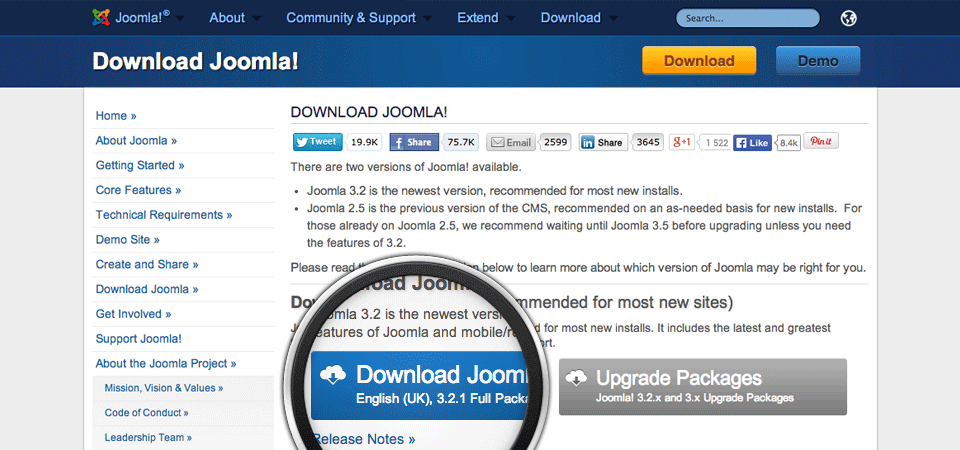
Obviously, we’ll need to get the actual installation package from the official Joomla webste before we can install Joomla. It is highly recommended that you download Joomla only from their official website on Joomla.org. This ensures that you have a clean installation package and won’t have to worry about some corrupt or harmful code that could have been inserted in the setup files.
Click on the “Download Joomla” button and the package will be saved to the destination you chose on your hard drive. We recommend saving it right to your desktop so that it is easy to find. What you have downloaded should have a name similar to Joomla_3.x.x-Stable-Full_Package.zip where the x’s can represent future versions released after these instructions have been written. Unzip/extract the file to a new folder on your desktop.
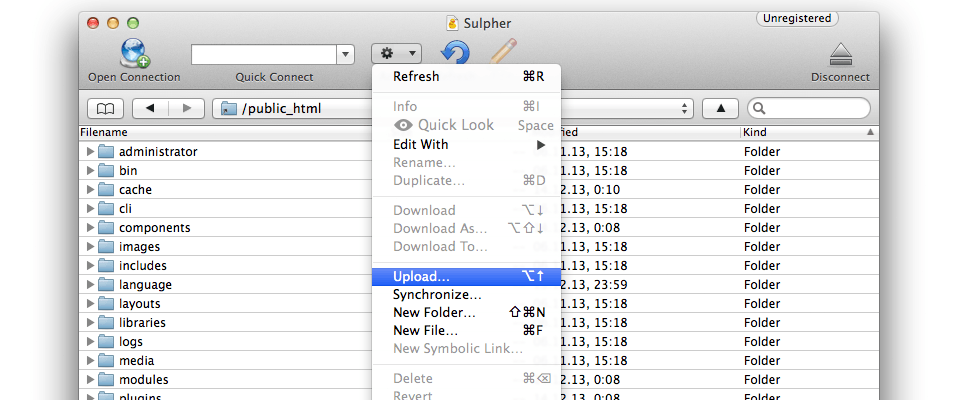
Step 2: Uploading the Joomla files on to your server
Upload the newly extracted files (not the .ZIP file) to your web server in the appropriate directory. We highly recommend using an FTP program such as FileZilla / CyberDuck.
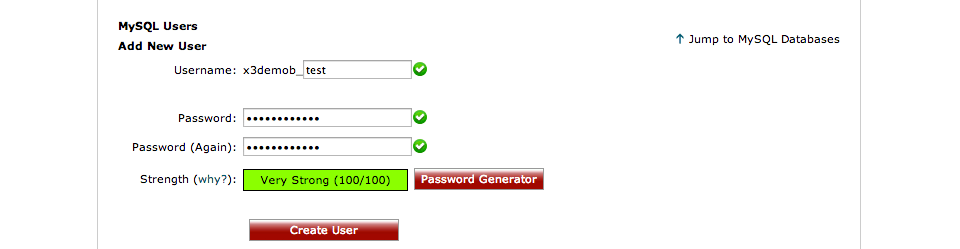
Step 3: Creating a MySQL Database for your Joomla installation
Joomla requires a database and we’ll now create our MySQL database with an assigned user who has full permission. We’d recommend writing down the credentials of your database (and all account information) on a piece of paper as you’ll need them for the duration of the installation process.
Step 4: Completing the Installation
After uploading your files, just go to your main domain or subfolder/subdomain where you uploaded the Joomla package. When you do this, you’ll be greeted with the Joomla Web installer, which will walk you through the rest of the process. The first step has us inputting all the necessary information about the site with our administrative username.
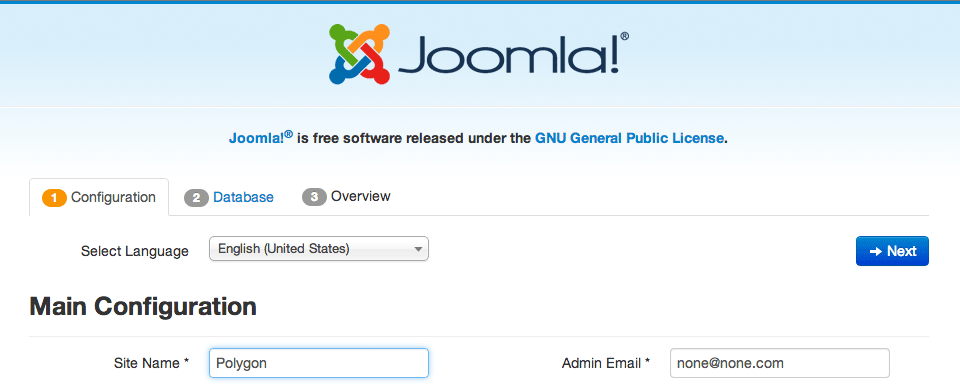
- Site Name: This is, obviously, where you site name should be! This is what almost all templates are going to use for the index heading.
- Description: Self-explanatory – simply add a very short description of your website. Please be aware that the positioning of the text will depend on what template is being used.
- Admin E-mail: Here you should enter the e-mail address you wish to use as an administrator. Make sure it is a valid e-mail as this will be used for any system messages or password recovery attempts.
- Admin Username: The username for your admin account should be unique. We highly recommend NOT using “admin” or “administrator” since these account names are very easy for hackers to guess.
- Admin Password: This is the key to your house and it should be as strong as possible. We recommend lengthy and completely random passwords. For example: SDuiwejnf83M – a good way to do this is to just let your fingers hit the keyboard a few times in random spots and then capitalize a couple of the letters and – voila! – your password is born!
- Site offline: With this option, you are selecting whether or not you wish for your site to be offline when you’ve completed the installation of Joomla.
When you have completed filling in all the information, click on “Next” where you will need to enter all the information from your MySQL database that was just created.
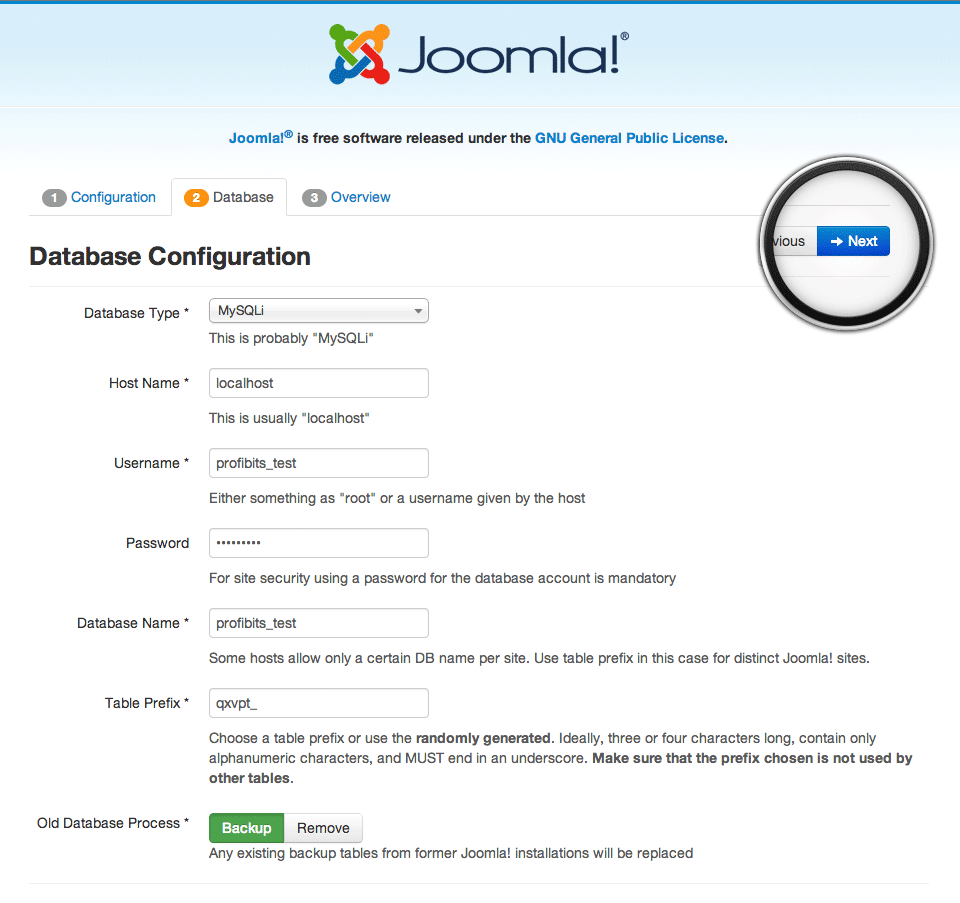
- Database Type: As default, MySQL will be the default value. This is an optimized version of the regular version of MySQL database and is support on almost all modern servers.
- Host Name: Leave this on the default value of localhost unless you were otherwise specifically told to change it to something else.
- Username: This is the username you created for your MySQL database from Step 3.
- Password: The password you created for your database username from Step 3.
- Database Name: Put the name you gave your MySQL database from Step 3.
- Table Prefix: Leave the default value. This is a prefix for database tables that would be useful if you were to hose multiple Joomla sites within a single database.
- Old Database Process: We’d recommend leaving this option on “backup” because it is the safest choice to make. In this instance, we’d be able to decide what we want to do if we had existing databases. We can remove or backup any data that we are about to replace with the current Joomla installation.
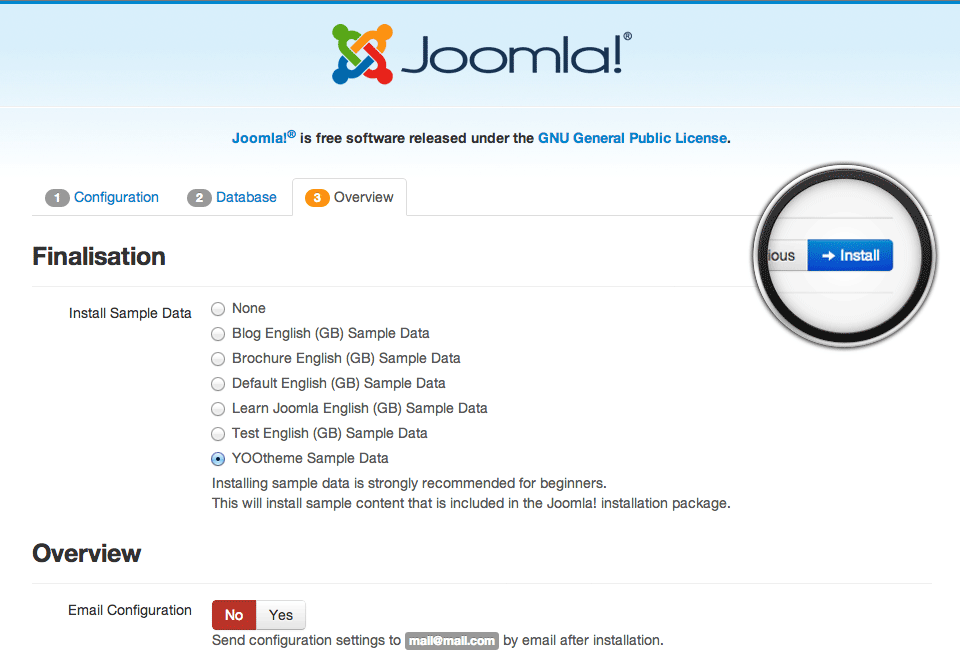
Press the “Next” button when you’ve finished and you’ll be sent to the last page of the process. (Woohoo!) Here you can specify if you’d like sample data to be installed. If this is your first time or are a little bit of a new Joomla user, choose the “Default Sample” data because you’ll be able to build from it as an example of what to do. (You can always decide to delete the sample data later, so there is fear of harming your website in the future.)
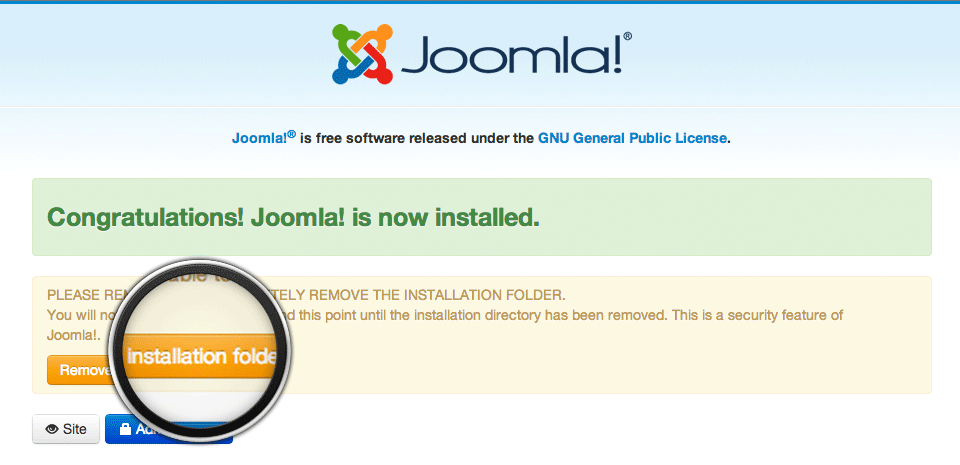
Step 5: Success!
You now should see the wonderful message of success with text recognizing that you’ve now installed Joomla 3.x on your server!
Click “Remove Installation Folder” and you’re good to go. Congratulations!